Voice Management Guide
The Voice Management user guide
Configuration of integrations
1 - Installation of the plug-in
To install the Voice Management toolbar in your CRM, follow the stages below:
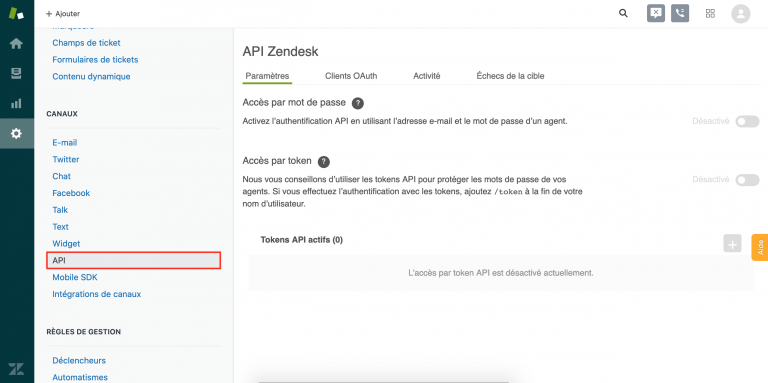
In your administrator interface, click on API in the menu on the left, in your settings, then activate Access by password and Access by token.
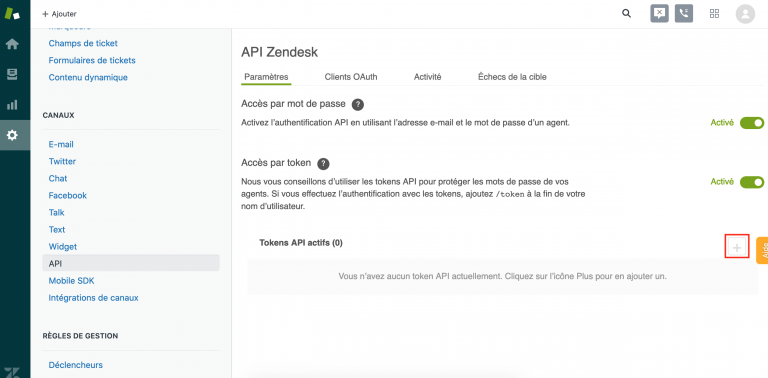
Click on “+” beside Active API Tokens.
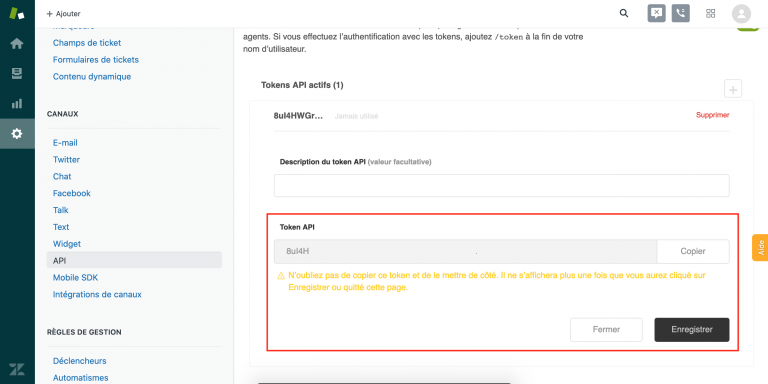
The API token will appear. Please save it and send it directly to Axialys. This will no longer be visible once the page has been saved.
Then save the page.
Please send the following three pieces of information to Axialys:
– The API token
– The email address of the Zendesk administrator account
– The domain name
Axialys will provide you with an Axialys token, which you can use for the stages below:
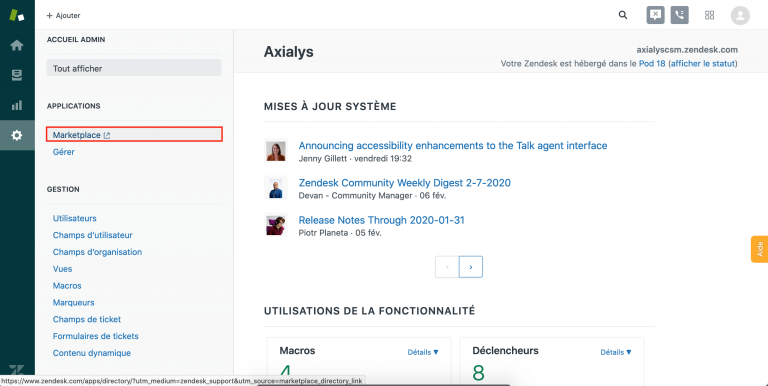
In your Zendesk Administrator account, click on Marketplace.
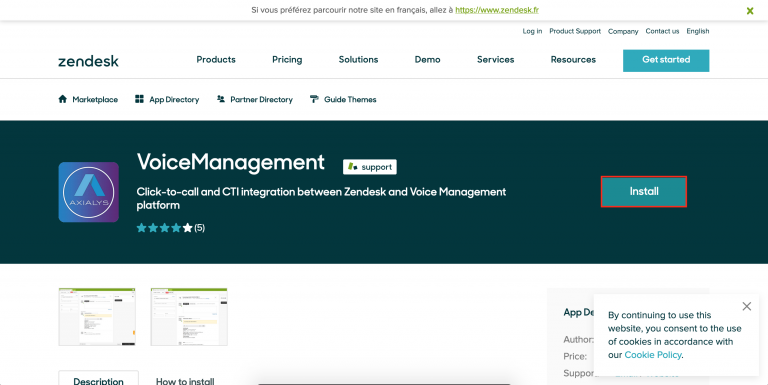
In the search bar of the Zendesk Marketplace, search for “Voice Management” and then click on Install.
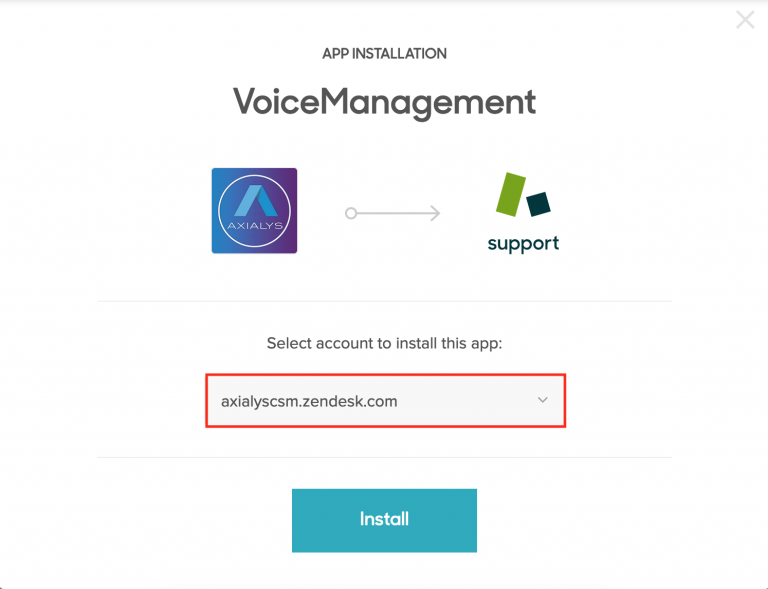
Please select the administrator account affected by the installation of the Voice Management application. Then click on Install.
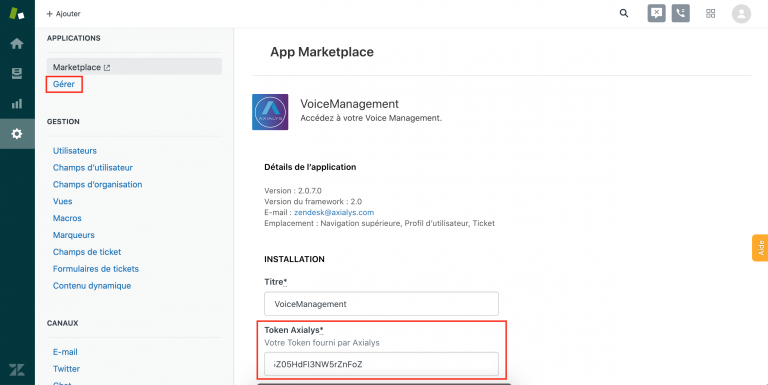
Go to your settings, click on Manage > My applications and select the Voice Management application. Copy/paste the Token into the Axialys Token field.
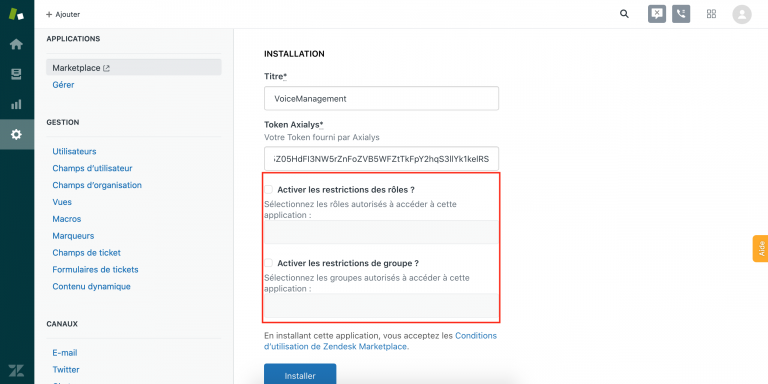
Depending on your requirements, you have the ability to apply restrictions on the use of the application.
Please use the same email addresses across Zendesk and Axialys (administrator or operator). When you change your administrator address for the Zendesk account (or the domain name), please inform Axialys so that this can also be taken into account in the Voice Management application.
When creating Operators in your Voice Management Administrator Interface, you must fill in three fields in order for the operator toolbar to function:
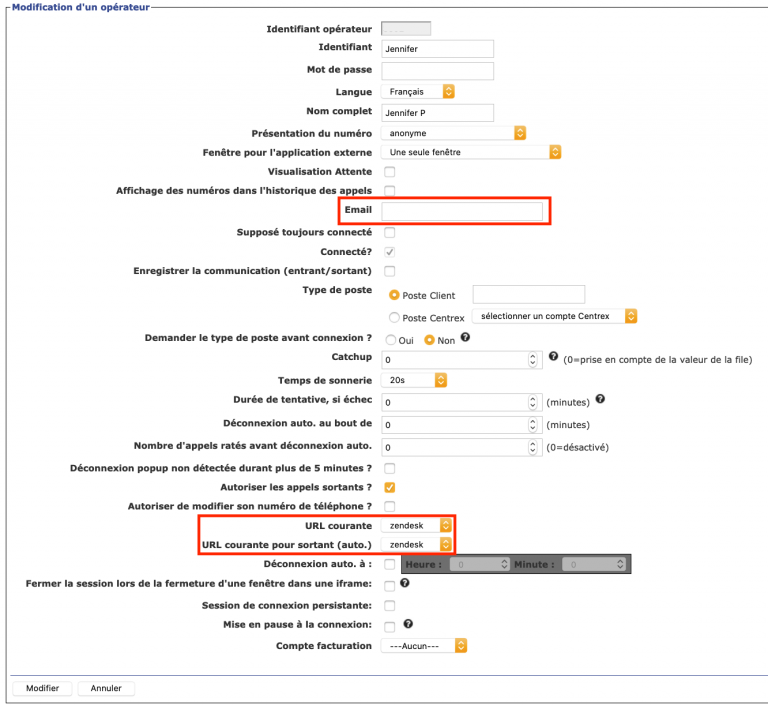
Email address: used to log into Zendesk
Current URL: Zendesk
Current URL for outgoing (auto.): Zendesk
Zendesk – Installation of the Voice Management application
Install the Voice Management application in your Zendesk interface in just a few clicks
If you use an ad blocker, this may affect the proper functioning of your solution (not displaying the banner for example).
2 - Displaying IVR information on the ticket
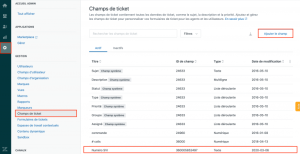
In your Zendesk interface, go to “Settings“, then “Ticket fields“. Click “Add field“, which must be a “Text” field then name it before saving.
You will find this field in the list of fields that appear in the menu to the left of your tickets. Save the “Field ID“, this is helpful for linking the information to be displayed to the Zendesk field.
To display the number called
On your Voice Management administrator interface, in the section headings, select your IVR and create two “Variable” steps before the group:
The first variable:
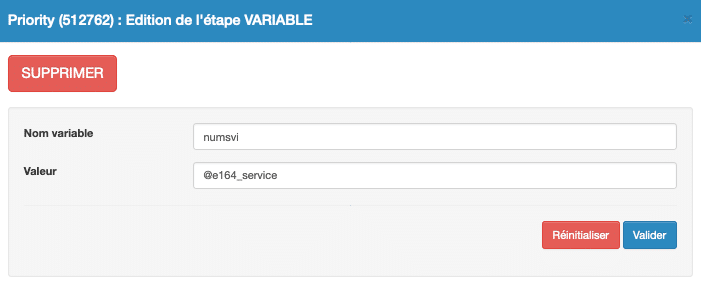
Variable name: Use whatever variable name you want.
Value: @e164_service
The second variable:
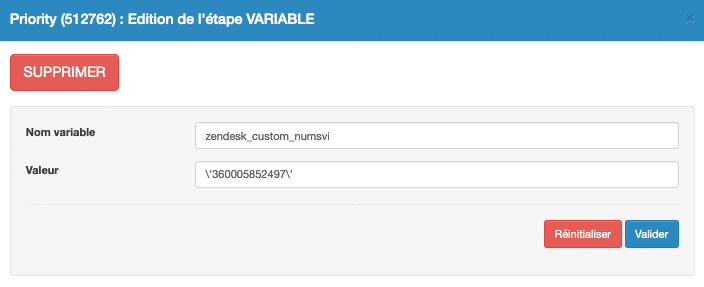
Variable name: zendesk_custom_
Value: ‘
To display information entered in the IVR
On your Voice Management administrator interface, in the section headings, select your IVR and create two “Variable” steps before the group as well as an “Input” step:
The step entered:
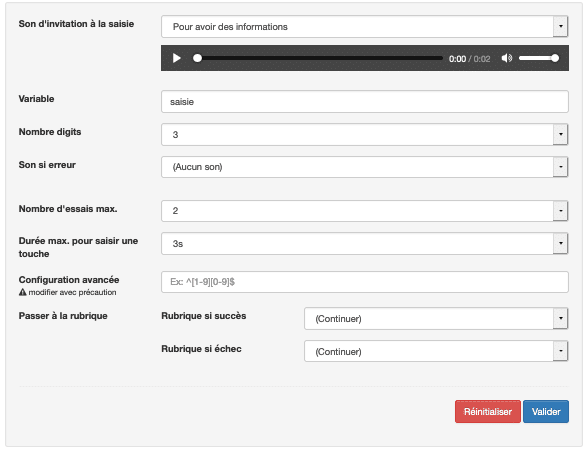
Input prompt sound: Enter the sound that will tell the caller what to type.
Variable: This variable can be found in the next variable step.
Number of digits: Number that the caller must type for the entry to be correct.
Sound if error: This is played if the caller makes a mistake.
Max. number of attempts: How many times the caller can retry typing the requested input.
Max duration for entering numbers: How long the caller has for typing the input digits.
Go to section: if success or failure.
Variable Stage (1):

Variable name: Use whatever variable name you want.
Value: Indicate the value you entered in “Variable” during your “Input” step.
Variable Stage (2):

Variable name: zendesk_custom_saisie
Value: ‘
3 - Streaming voice messages in Zendesk tickets
To show the voice messages in Zendesk tickets, you must configure your IVR as follows:
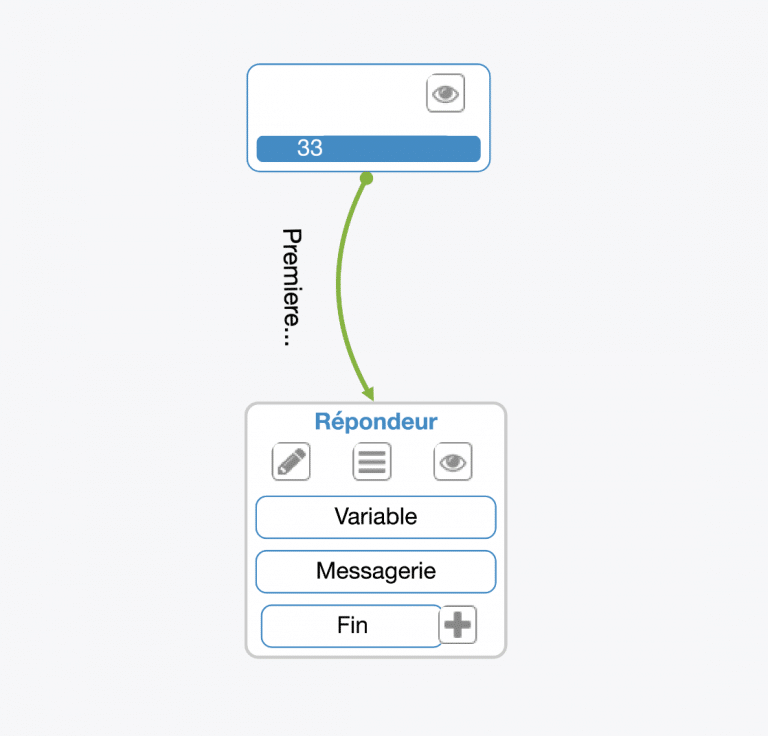
1- In a step, insert a “Variable” stage:
Lorem ipsum dolor sit amet, consectetur adipiscing elit. Ut elit tellus, luctus nec ullamcorper mattis, pulvinar dapibus leo.
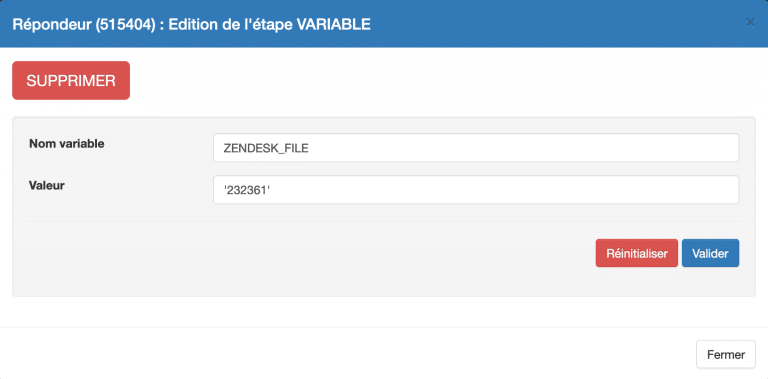
Variable name: ZENDESK_FILE
Value: ‘
How do you find the Zendesk group number? Go to your Zendesk instance. In the menu on the left, go to Admin > Users > Groups > When you move the mouse over a group, the number is displayed in the status bar. Please use the number after the final “/”.

2- Next insert a “Messaging Service” stage:
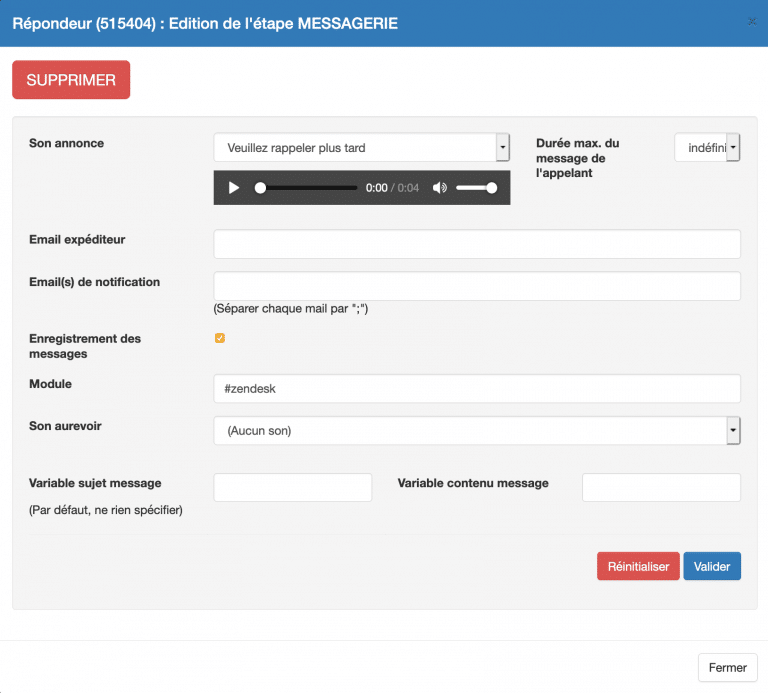
This must be configured as follows:
Module: #zendesk
The “Message recording” box must be checked.
You can configure the remaining fields however you like.
4 - Open a form during an incoming call
It is possible to open a form during an incoming call.
To do this, you must have previously configured a form in the Zendesk Admin Center to retrieve the form ID. this form you will find in the URL:
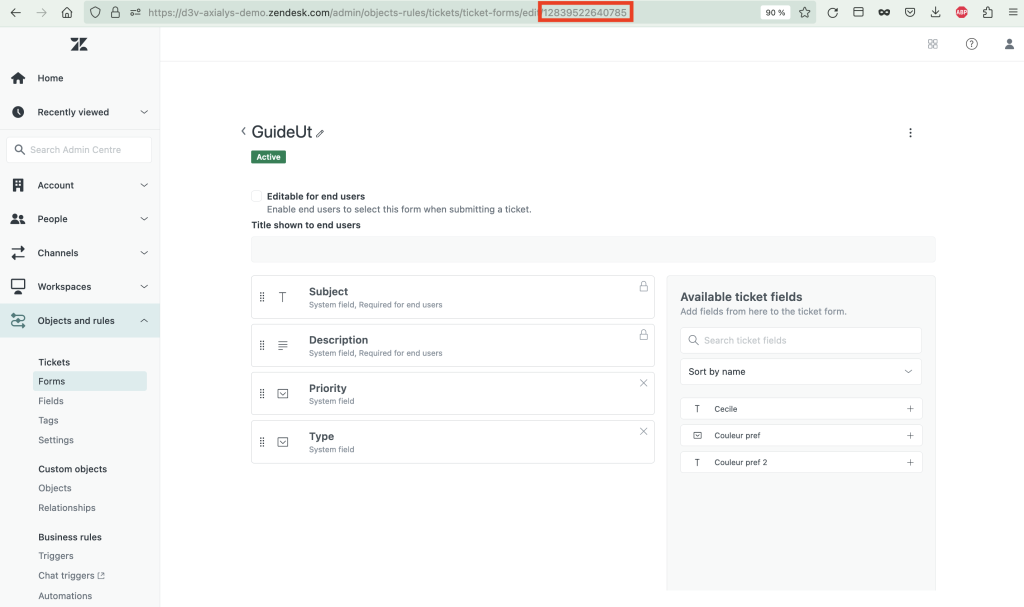
Then go to the Voice Management administrator interface at the Headings level.
In your IVR, include a “Variable” step where you will inform the ID of the form.
Variable name: zendesk_form
< p>Value: ‘<Form ID>’

Si aucune variable zendesk_form n’est configurée alors le comportement “classique” sera effectif. Il vous est possible ainsi d’ouvrir des formulaires différents selon vos branches de vos SVI.
- Table of Contents