Voice Management Guide
The Voice Management user guide
App installation
Find us in the AppExchange
The following documentation explains how to install Salesforce very simply. A video at the end of the article allows you to follow the stages directly.
This documentation is valid for the versions of our application from version 1.6 on.
It is important to specify that this documentation is only for Salesforce Lightning and not for Salesforce Classic
For optimal operation of the solution, please only use a single browser tab with the solution connected on it.
If you want to update our application by downloading the latest version via the appexchange, please do the maneuver explained in point "11 - Finalize the installation" of this document
2 - Recovering your API login details
Contact your Axialys Customer Success Manager ([email protected]) to recover the login and password assigned to you for the API.
3 - Named credential creation
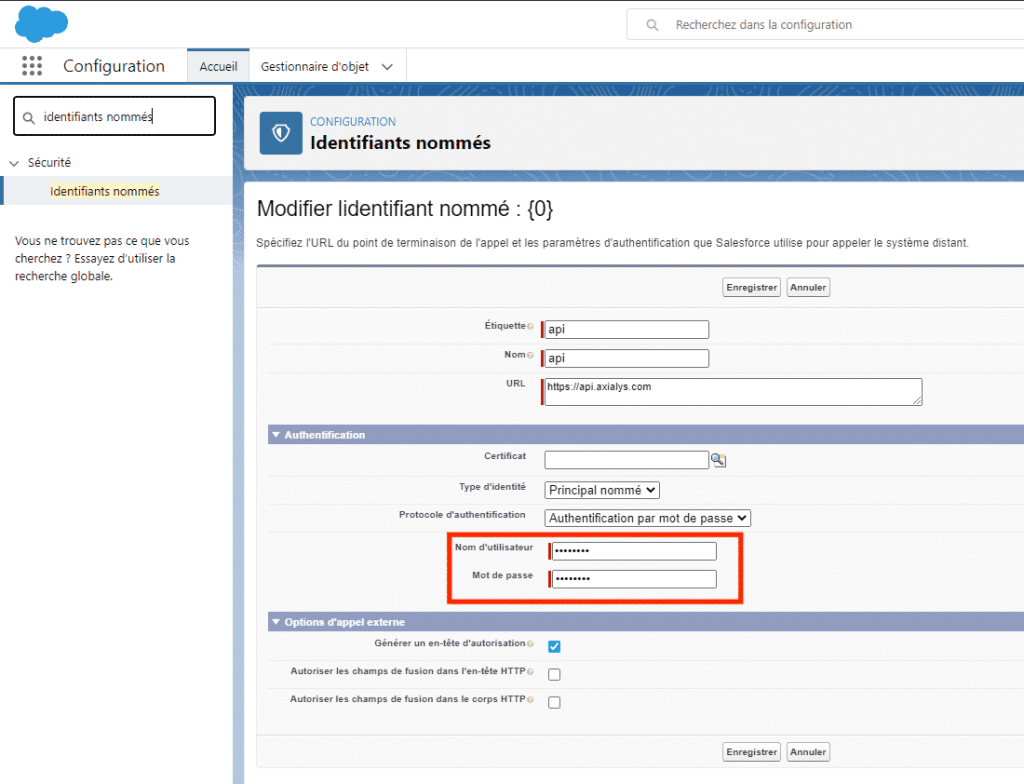
Go to configurations > Security > Named identifiers: Fill in the fields as follows:
- Label: Free title
- Name: Free title
- URL: https://api.axialys.com
- Identity type: Named principal
- Identification protocol: Authentication by password
- Username/Password: API given by the CSM
In Outcall option, please leave the default settings: “Generate authorization header” checked and the two other options unchecked.
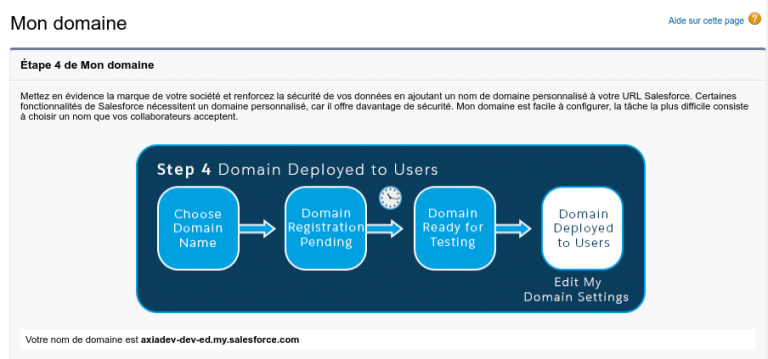
4 - Personalised domain
It is recommended that you acquire a domain that is simpler to remember, by creating one in Configuration / Company setting / My domain, then entering your desired prefix. This may take a few moments, so please be patient.
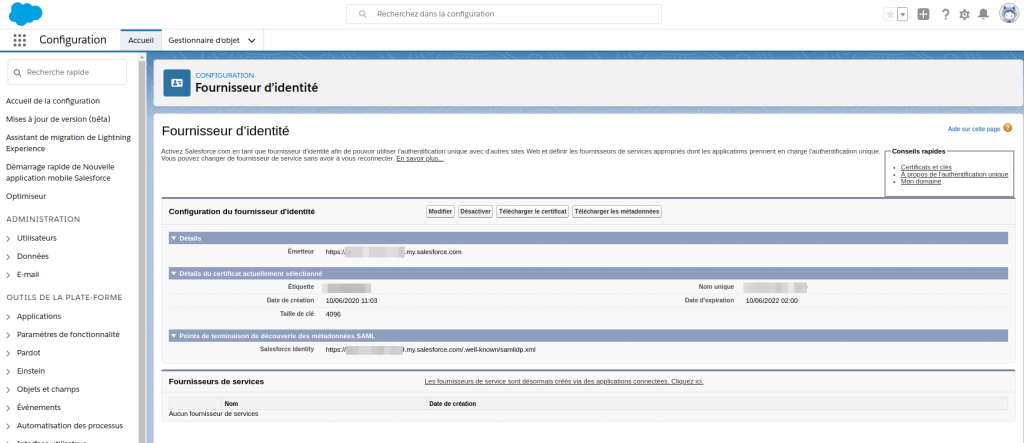
5 - Activating the Identity Provider
To activate the Identity Provider with Salesforce, go to the Configuration / Identity / Identity Provider menu. Click on the Activate the Identity Provider button, select the auto-signed certificate or another certificate that you have created, then select Save.
6 - Installation of the application
Available on theAppExchange.
Choose for whom you wish to install it: Install for all or Install for profiles then click on Install, in the pop-up check the Yes, grant access to these third-party sites box and then Continue
7 - Configuring profiles
To grant users authorisation to access the Voice Management module, you must activate it at the profile (or group) level.
In the Configuration / Users / Profiles menu, select a profile from the list and select Change. Then search through the Access to the connected application step and check the Voice Link box, then Save.
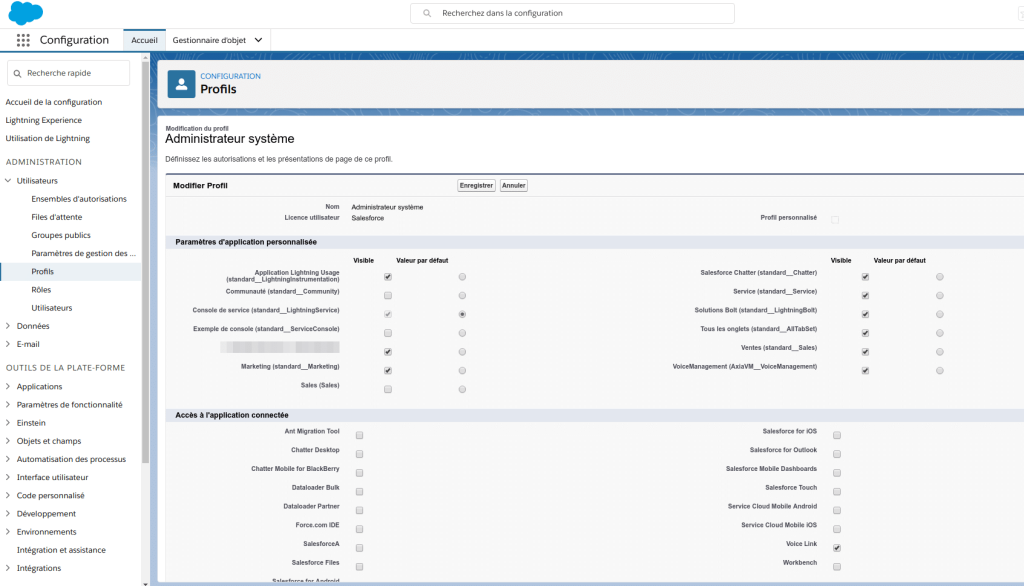
If the profiles page cannot be found, go to the Configuration / Users / User management settings page, activate Optimised profile list views, disable Advanced profile user interface and try again.
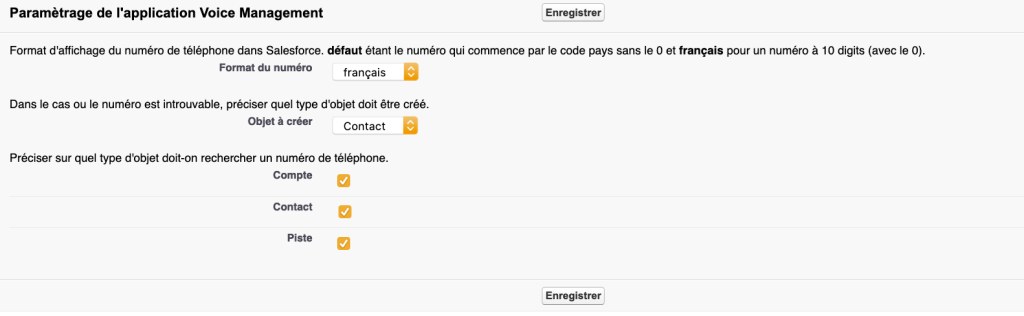
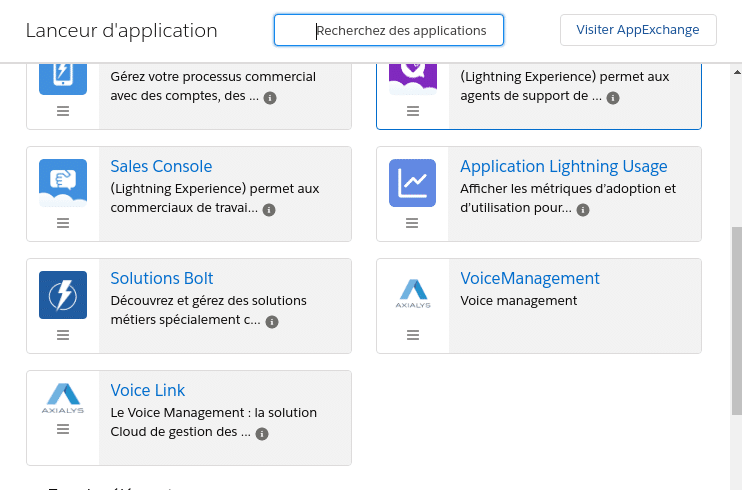
8 - Configuring the application
Click into the application selector and choose the Voice Management application. In the list of pages, you should find Settings.
In the “Voice Management application settings” section, check the Account, Contact, Lead boxes.
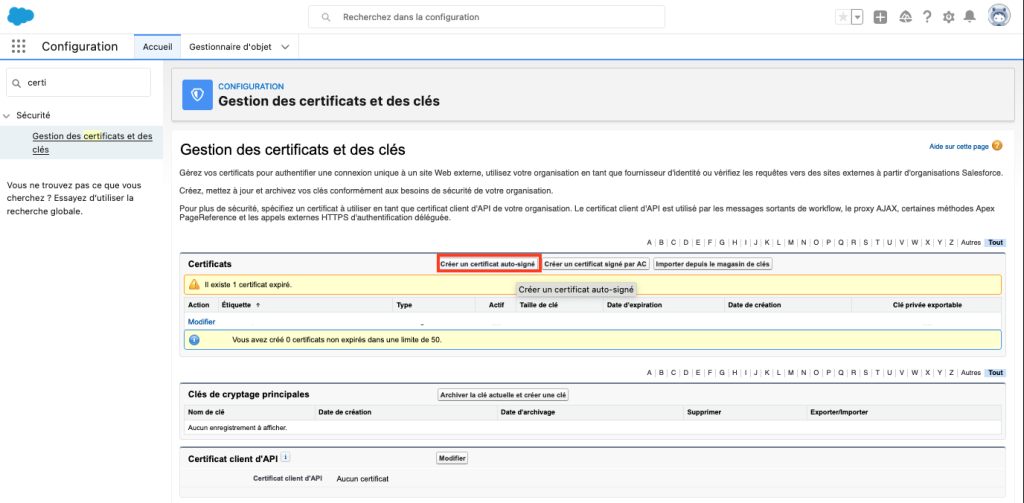
9 - Generating a Certificate
In configuration, search for “Management of certificates and keys”. Then click on “Create an auto-signed certificate”
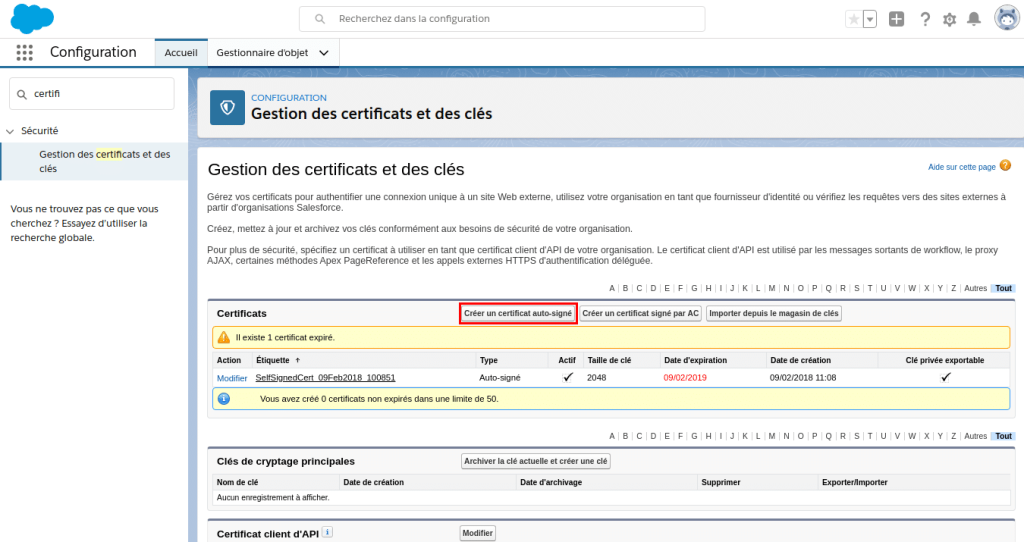
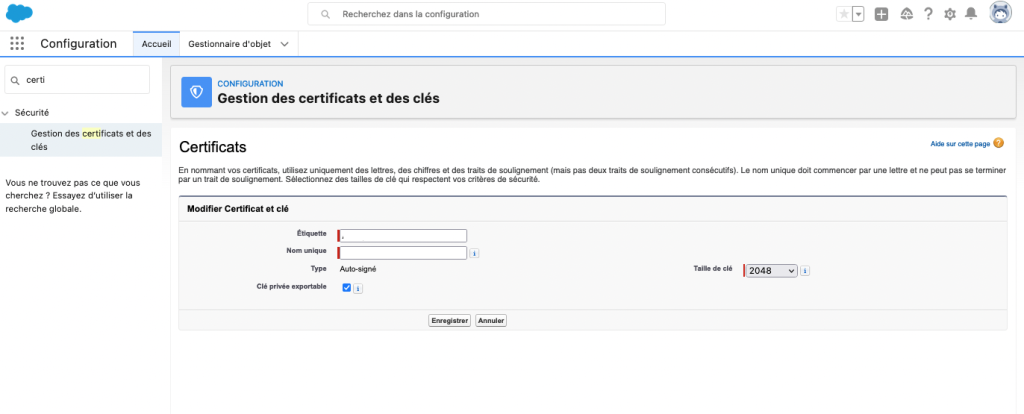
Name the Label and assign the Unique name, for example Axialys and Axialys2020. Then click on “Save”
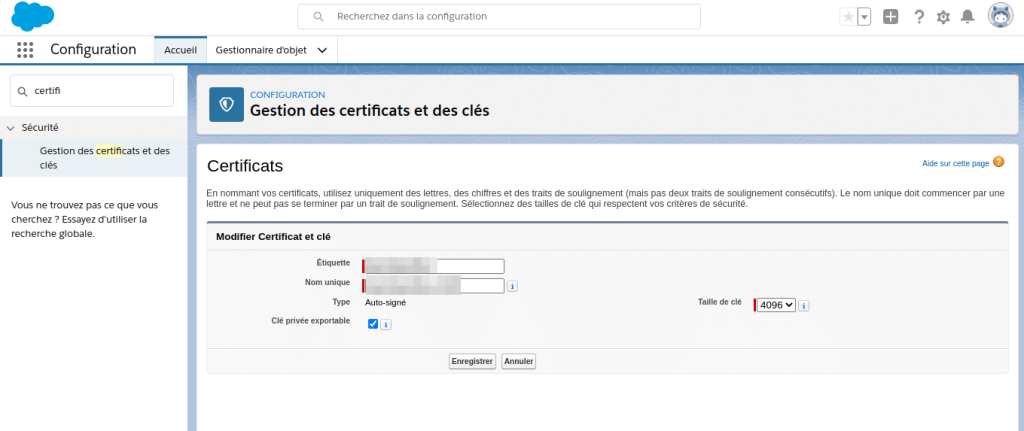
You have now generated your certificate.
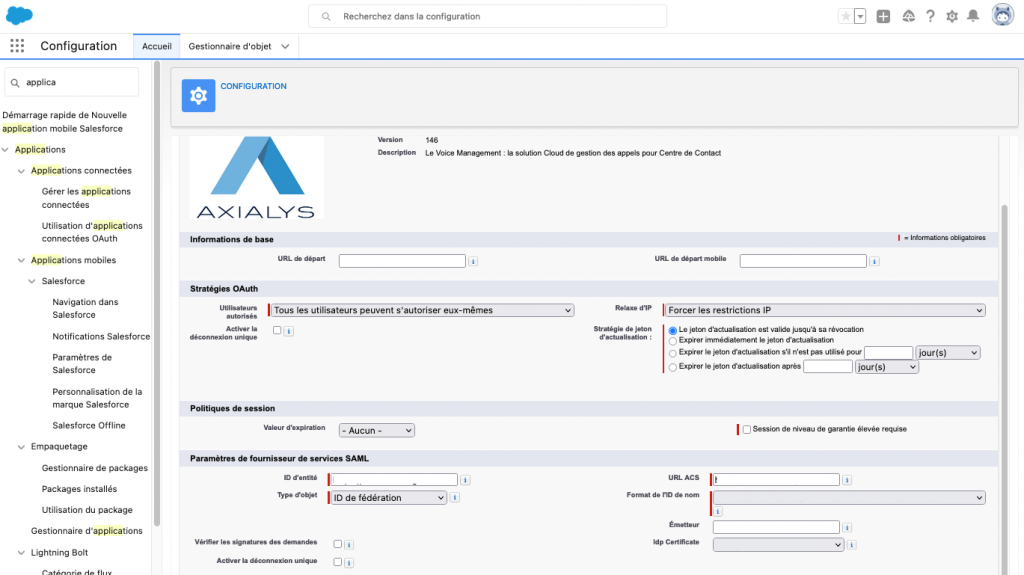
Go to “Connected applications” to fill in the respective information:
In configuration, search for “Connected applications”. In the “SAML services provider settings” step you must select the certificate that you wish to generate from the “IDP Certificate” drop-down menu. Then save the page.
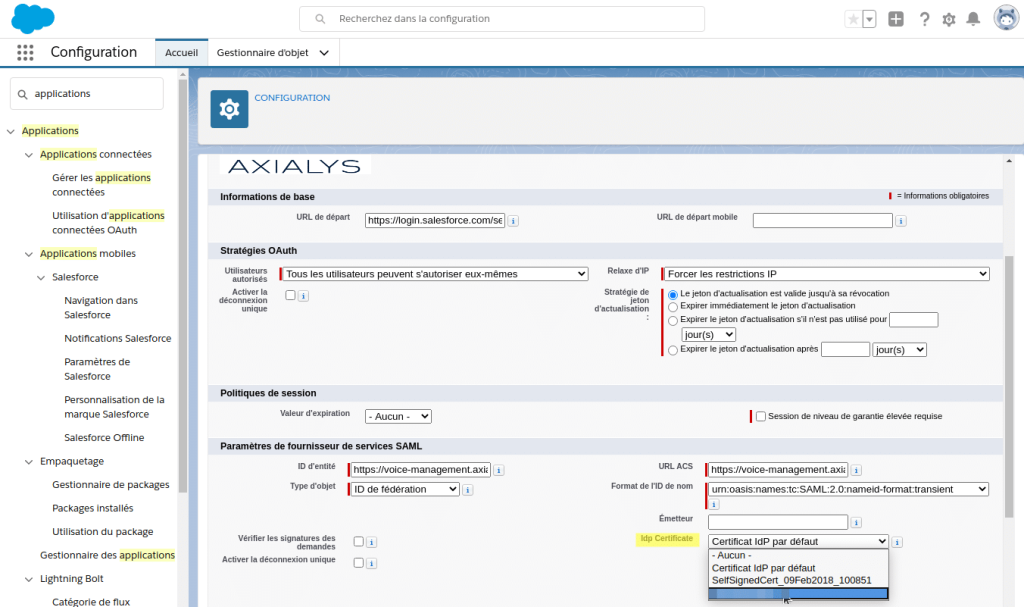
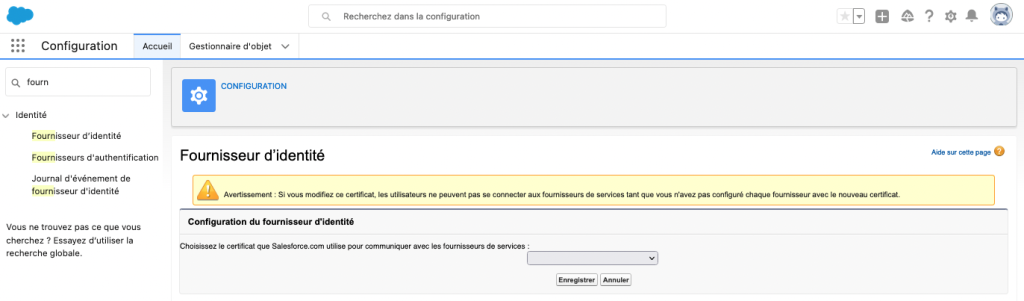
You must also fill in this certificate in “Identity Provider”.
In configuration, search for “Identity Provider”. Click on “Change” and select the correct certificate.
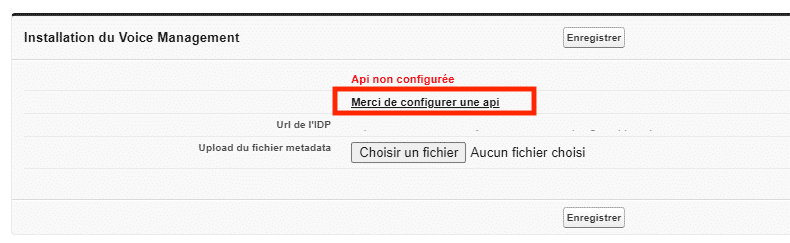
10 - Recovering the metadata file
Go to Manage connected applications and click on Voice Link. In the SAML login information section, click on the Download metadata button, without renaming the data.
Finalising the installation
You can now re-enter this information (API login details and metadata file) in the Settings page. Once the file has been imported, the URL will be modified (which indicates that the file has been successfully imported).
You must then go to the Voice Link application, which should display a welcome message.
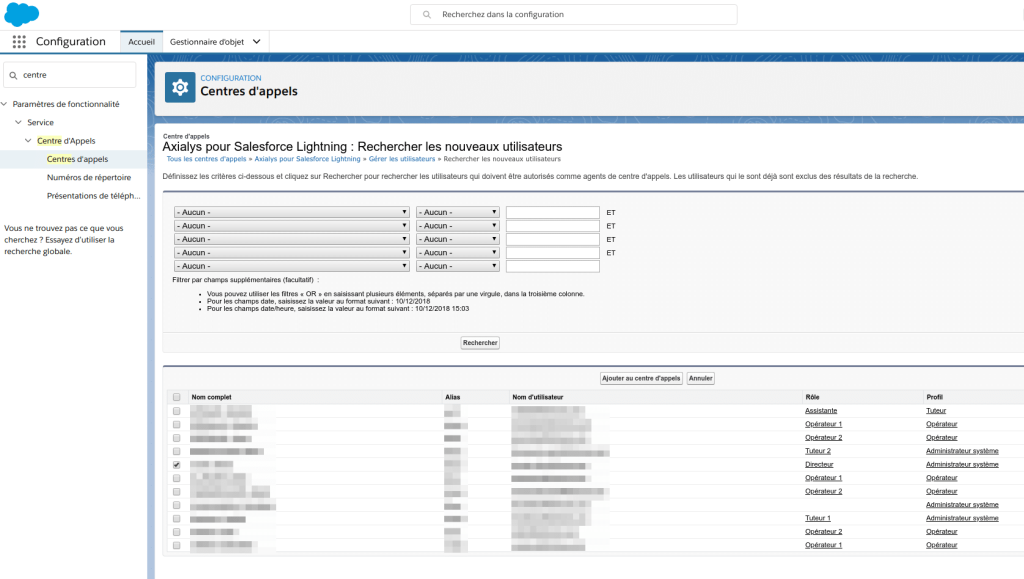
Configuring Users
In Configuration / Users / Users, for all users, you must make sure that the Federation ID field corresponds to the email address of the operator in Voice Management. If this does not exist, fill it in.
Then in the Configuration / Functionality Settings / Service / Call Centre / Call Centres section, click on the name Axialys for Salesforce Lightning then Generate Users and add all of the accounts that use Voice Management (as a reminder, an individual can only belong to one centre).
It is not possible to use the "connect as" feature with the Voice Management connector due to the use of the SSO connection.
13 - Installation video (French)
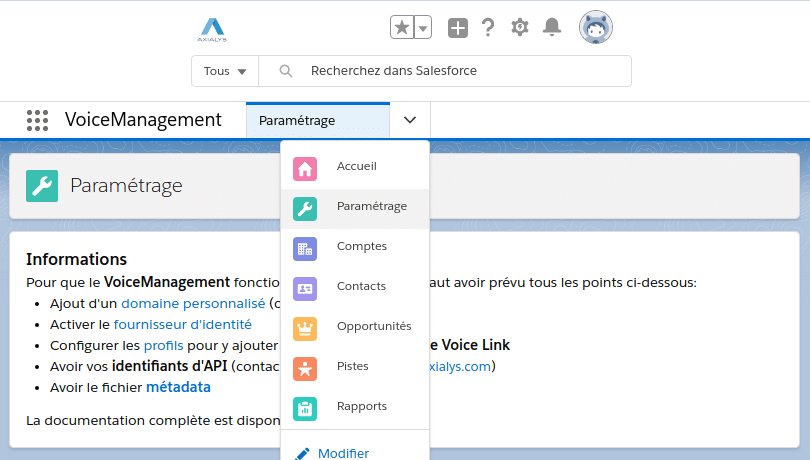
14 - Adding Voice Management and datasheet display to my application
By default, the Axialys Voice Management connector comes with a Voice Management application. This application serves as an example of what you can do.
There you will find a simple version of Salesforce and the integration of the Voice Management toolbar, the display of Account pages, Contacts and Leads, with call history integration.
In order to find these features in your application, a few changes must be applied.
For the purposes of this demonstration, let us suppose that we are going to install the Voice Management tools in the Sales Console application.
15 - Displaying the Voice Management toolbar
The first element to be added is the integration of Voice Management into Salesforce, with the tab that enables displaying/hiding.
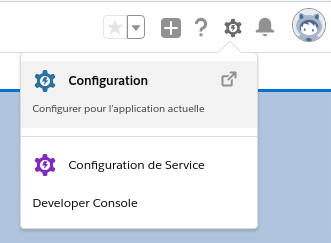
Go to configuration
In the Applications / Manager menu for the applications, click on the arrow at the end of the Sales Console application row, then select Change.

Select the Utility Elements link in the left menu, then click on Add a utility element and find Open CTI software telephone.
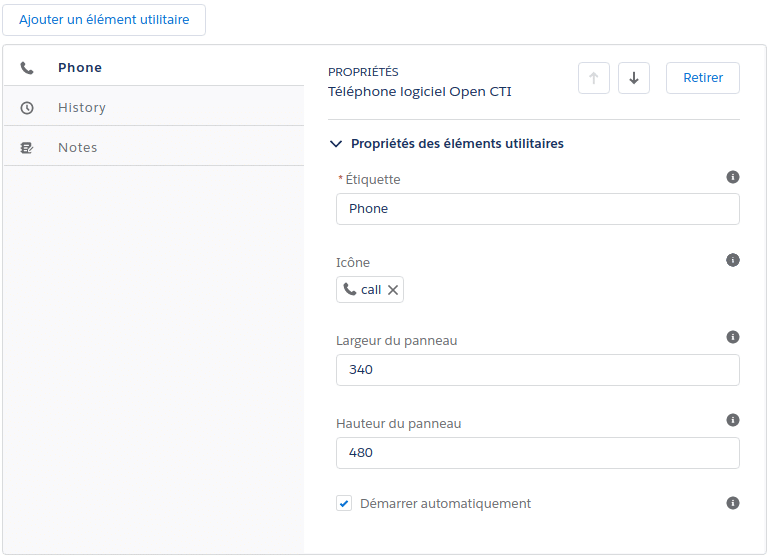
You can change various settings: the label, the icon and the dimensions (a width of 400 and a height of 700 are preferable)
Save and close this configuration window.
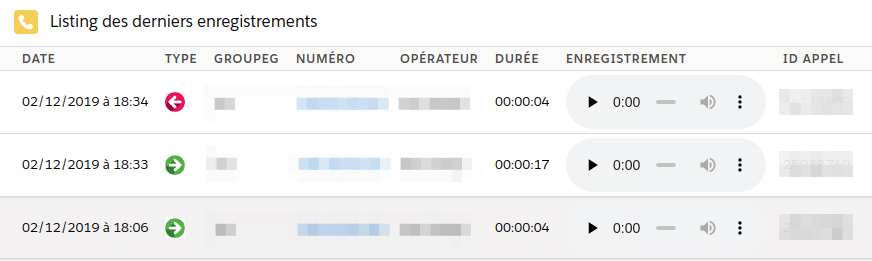
16 - Addition of call history
You can display the call history of a contact, an account or a lead.
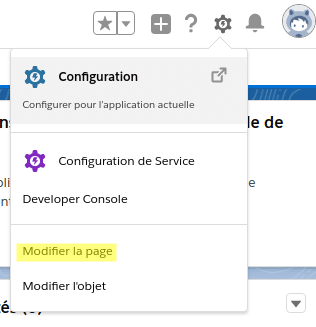
To do this, you must open a Contact, Account or Lead page and click on Change the page
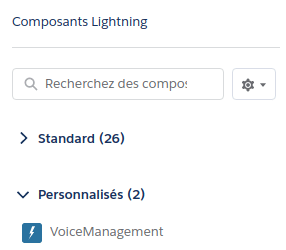
You will find the Voice Management element in the Personalised Lightning Components. All you have to do is drag it and drop it where you want it on your page.
Next click on Activation, and then Attribute for the organisation by default and Validate.
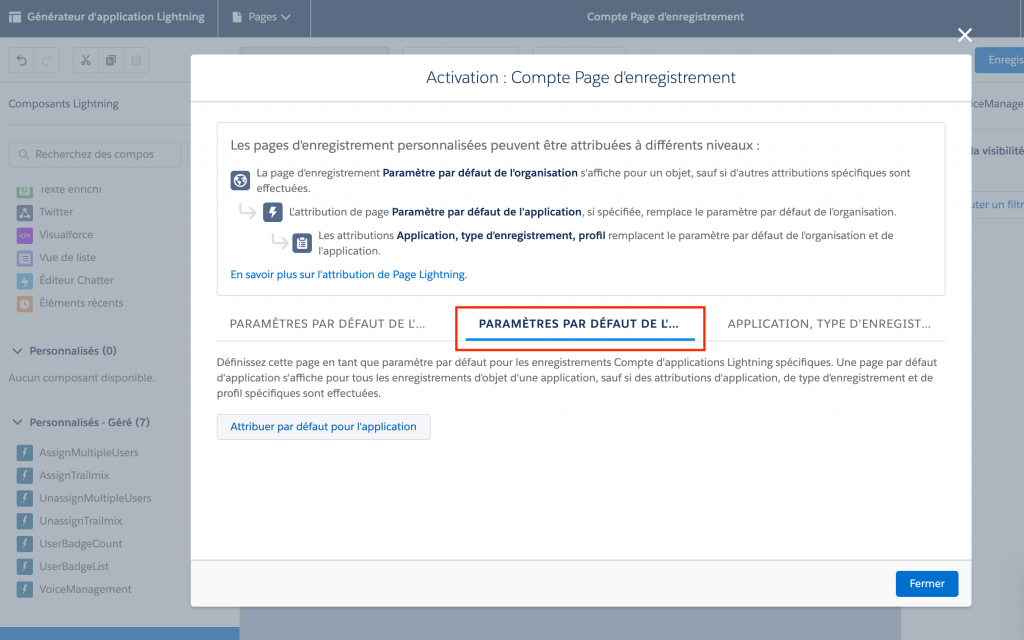
Click on Default settings and then Attribute for the organisation by default.
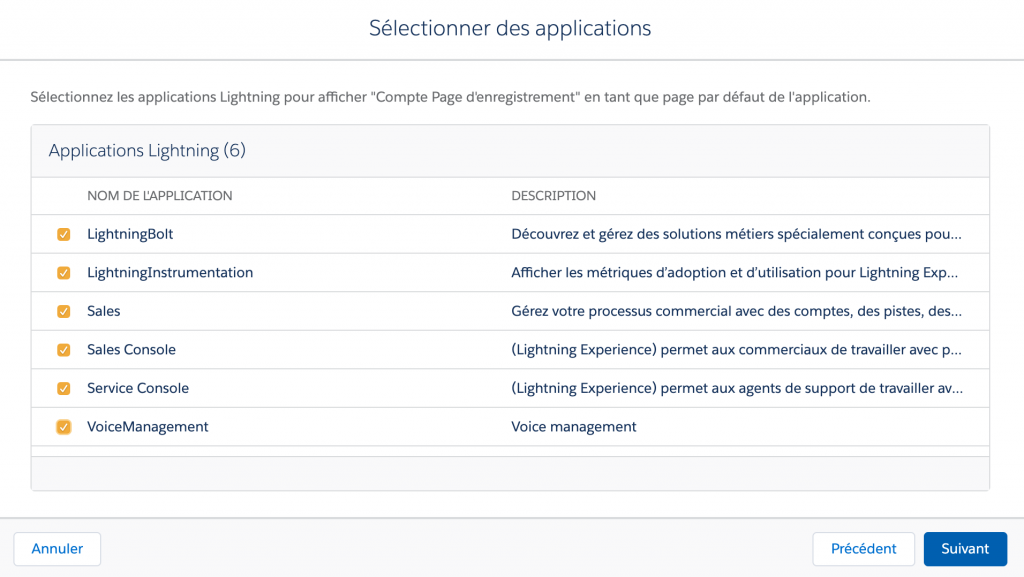
Select all of the applications in which you want the Voice Management element to appear. Then click on Next.
Finally, click on Save and observe the result in the respective page.
Repeat this change on the other remaining pages. Note: you must open an Account, Contact or Lead and not the list.
17 - Datasheet display is not working
In the event that the datasheet display is not working (whether a created or an existing datasheet), you must verify that the operators are within a profile that has the appropriate access.
If the operators’ profile is of the Standard User type, you must use another profile – either a clone, or an existing profile – in order to add the Access Admin.
Select the Profile to be changed and click on Change.
There you must change the Standard object authorisations to grant the appropriate access to the Accounts, Contacts and Leads.
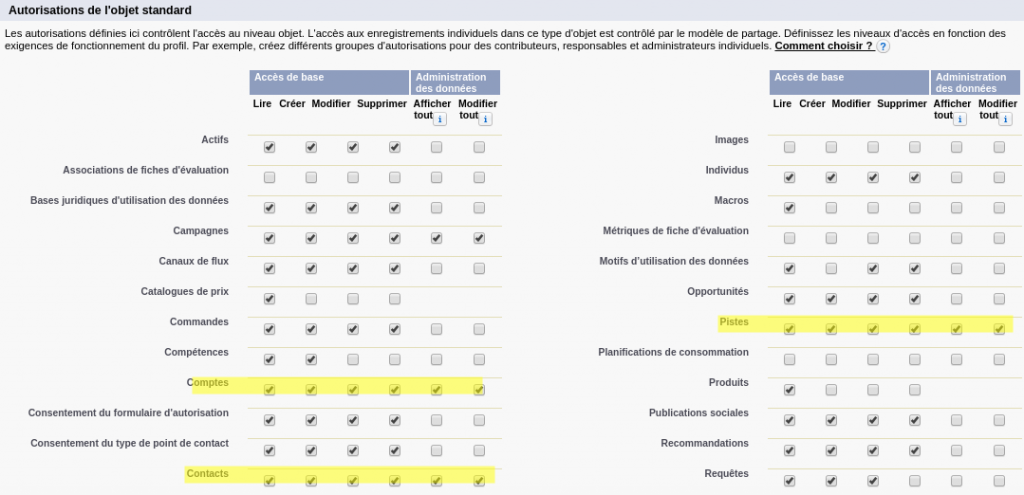
You must also modify the Personalised object authorisations to assign all of the Access Admin rights to the Voice Management Calls, ConfigCTI, StatsPopups.
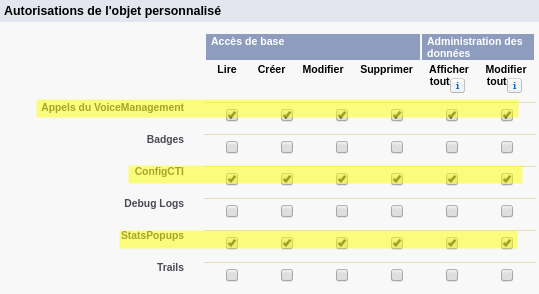
It is not essential that you grant the data administration Access Admin permissions (at the end of the table).
18 - The escalation of calls is not done in "Listing of recent calls"
If the calls do not appear in the “List of recent calls” box, please check the rights in:
Setups > Search for “object manager” > in “Contacts” > “Fields and Relationships” > “Other Phones” > “Set field-level security”: Check the correct permissions (all if possible)
Do the same at: contact/phone, contact/other phone, account/phone, lead/phone, lead/mobile phone
19 - Updating certificates
Go to the configurations then to “Certificate and key management” and create a “Self-signed” certificate
Fill in the titles you want and click on “Save”.
Go to “Identity provider”, choose the new certificate and save.
Go to “Manage connected applications”,
Click on “modify” the Voice link,
In “IDP certificate”: Select the desired certificate,
To validate the renewal of the certificate, please follow the steps indicated in part 11 of this document.
- Table of contents