Voice Management Guide
The Voice Management user guide
Magento Integration
Do not start this procedure until the automatic authentication does not work when you go to the page: https://voice-management.axialys.com/operateurs/saml_sso/<ref_client>
1 - Installation of the plug-in
To install the Axialys app on your Microsoft environment, please send a request to your CSM contact for the app installation link
2 - Configuring the integration
To configure the integration settings in your Microsoft environment, go to your Voice Management administrator interface as well as your Microsoft Dynamics administrator interface.
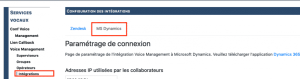
On the Voice Management administrator interface: Go to the “Integrations” tab then the “MS Dynamics” sub-tab.
3 - Connection settings
In the “Connection settings” area, you will be enabling automatic banner connection for your users once logged in to their Microsoft environment.
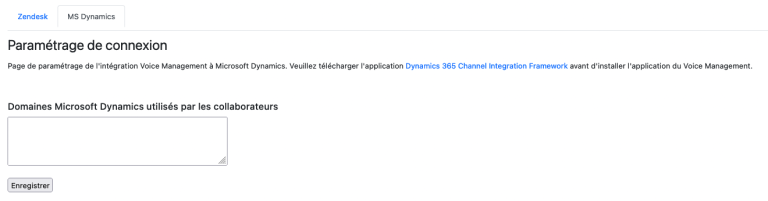
You must fill in the user domains. To do this, copy/paste the URL of your Microsoft environment. You can copy and paste the whole URL, the interface will clean up the address. You can add more than one. To add an address, go to the line and copy/paste the URL.
Click on “save”.
4 - Configuration example
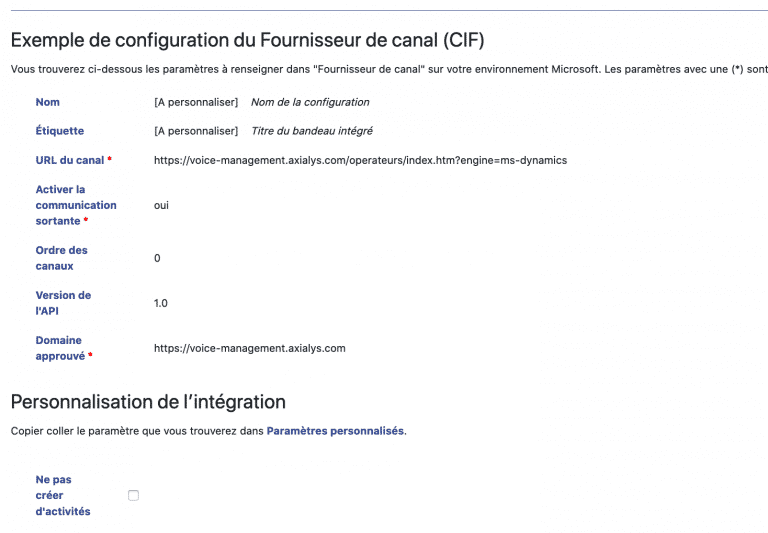
In the second area “Example of how to configure the Channel Provider” you will be able to configure the Voice Management app.
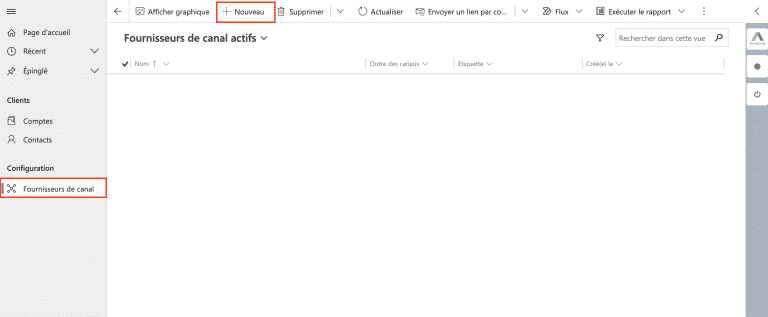
Go to your Microsoft Dynamics administrator interface. Open your administrator interface, click the “Axialys Voice Management” app then go to “Channel providers“. Select “New“. You will be asked for a set of data. This data is available on the Axialys administrator interface.
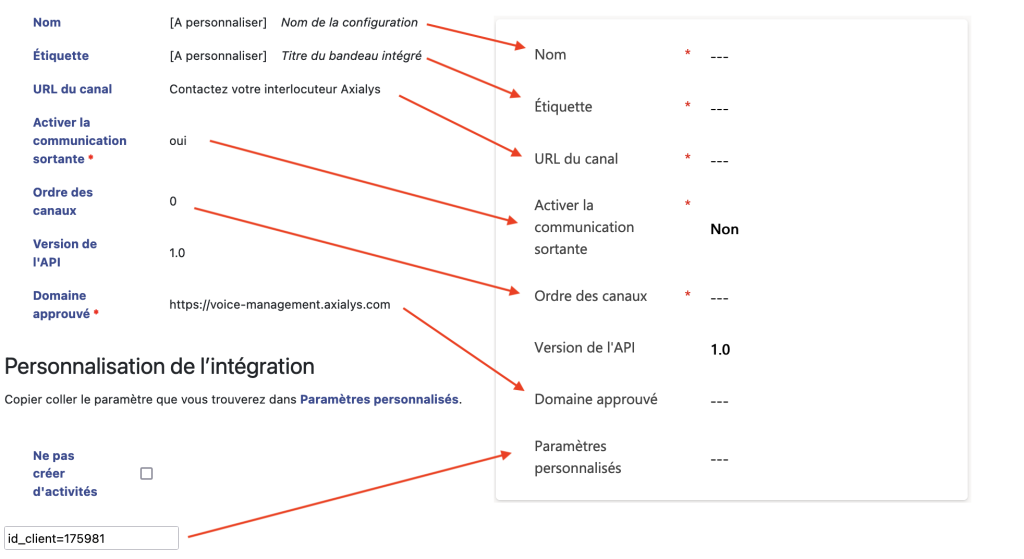
The “Name” is the name that this configuration is called (there can be several) and the “Label” is the title given to the banner integrated into your environment. You can customise this data to suit you. All data with a (*) must be copied just as it appears in Microsoft.
Click “Save” in Microsoft.
5 - Customising the integration
You can set things up to operate differently based on different configurations. In fact, you can set up optional automatic creation of activity logs during an incoming call.
The default behaviour is that for each call, Axialys will create a call activity log in the “Timeline” part of the customer page. We will fill in information there at the end of the call:
The type of call (incoming/outgoing call),
Caller number,
IVR number,
Call duration,
Call ID.
If you want different behaviour (the operator must fill in the call details manually, for example), you can set up these configurations on the same two interfaces as seen previously.
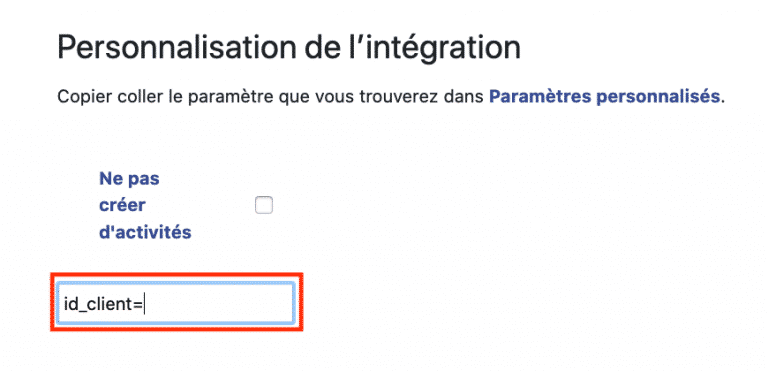
When you are on the Axialys side, you will be able to tick or untick the “Do not create activities” box, this will change the parameters in the field below. Copy/paste this setting into “Custom settings” on the Microsoft side.
6 - Authorisation of roles and apps
To complete the installation, you will need to specify where this app will appear for users.
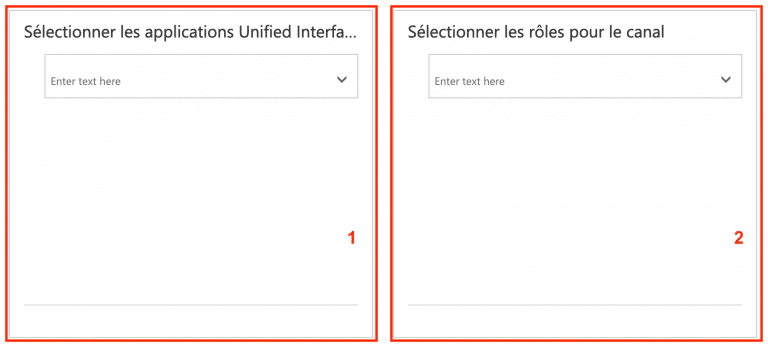
1- To do this, go to the “Select apps” box on the Microsoft interface. Using the arrow at the bottom, expand all the Microsoft apps and select those in question.
2- Complete the installation by choosing the profiles that will see the banner. Go to the “Select roles for the channel“ box. Using the arrow at the bottom, expand all the roles with access to the app and select those in question. As soon as you choose a role, the unselected roles will be unable to see the banner. With the exception of administrators.
Click “Save”.
Please note For the integration to work correctly, the Microsoft user’s email address must be the same as the one entered in the operator settings on the Axialys side.
- Table of contents