Voice Management Guide
The Voice Management user guide
- To start
- Prerequisite
- Home
- Administrator
- Importing sounds to your IVR
- Creating a routing
- Importing a directory
- Prohibit transfers to certain numbers
- Creation of a skill group
- Creation of an operator toolbar
- Gestion of an operator
- Creation of an IVR
- Satisfaction survey
- Campaign
- Webcallback
- Link WebCallBack
- Generating a WebCallBack link
- Gestion of a supervisor
- SMS service
- SMS in the operator toolbar
- SMS in the operator toolbar
- Statistics
- Operator
- Supervisor
- Technical side
- API
- SSO authentification
- Call recording
- Integration
- Application setup (Microsoft Dynamics)
- easiware integration
- Salesforce
- Zendesk
Information on the operator interface
1 - Information on the operator interface
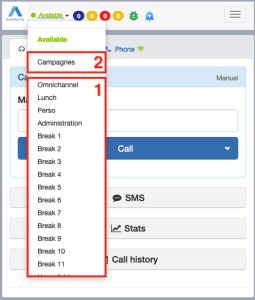
You can change your status. When you are \ available, you will be able to receive incoming calls.
When you go on a break, you can no longer receive calls. You have the ability to configure up to 15 different types of break, whereby only breaks with a title will appear. These breaks are configured directly from the administrator interface.
You also have the ability to set your status to “special break”. If you only wish to make outgoing calls (for example, if you are running an outgoing call campaign) without being interrupted by incoming calls, then you can place yourself on a “block incoming calls” break, meaning you will no longer receive incoming calls but your status will remain set to available.
2 - Queues to which you are linked
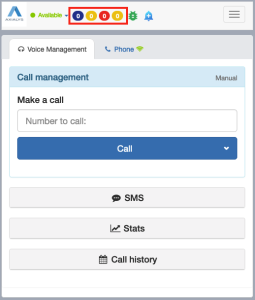
You can be linked to one or more skill groups. You can thus view the activity of your various call waiting queues. The groups to which you are linked will be represented by a colour code, and you can move the mouse over the coloured speech bubbles to find out the names of the groups.
The number of people currently waiting in the group is displayed inside these bubbles. This will allow you to reset your status to Available if you observe that there are too many people waiting in your groups, even though you are currently on an “administration” break, for example.
3 - The beetle
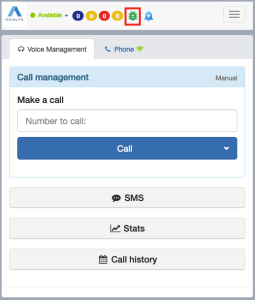
The button shaped like a beetle tells you the status of the system in the event of an fault. This information will be requested by the support team in case of a fault. You must then click on the button and copy/paste all of the information displayed.
4 - Your personal and daily statistics
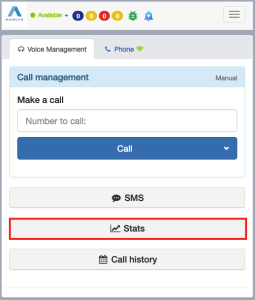
You can access your personal and daily statistics via your operator toolbar. You will then be able to find out the following, in real-time:
– The login date and time
– The number of missed calls
– The number of outgoing and incoming calls
– Your ACT (Average Communication Time)
– The reference for your last call
– The reference for your penultimate call
– Your break time
5 - The history of your last 50 calls
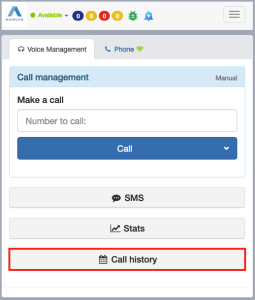
You also have the ability to view the history of your last 50 calls, with the following information:
– The date and time of the call,
– The ID of the call (each call has a different and a unique ID) ,
– Type of call: Outgoing/Incoming,
– Status of the call: Answered/Cancelled/Engaged,
– The call recipient/caller number: this information can be configured so that it does not appear in the agent’s history,
– The communication time,
– The group: to which or from which the call was made/received.
6 - Changing your call reception number
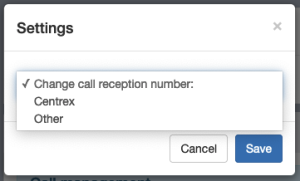
As previously stated, in order to use the Axialys operator toolbar, you must acquire the toolbar via your browser, as well as a telephone (which can be a landline telephone, a mobile or a softphone). When an operator makes or receives a call, this will interact with his telephone. For example, if the agent receives a call, his operator toolbar will notify him of the call and his telephone will ring.
To enter your number, click on “setting” and indicate your Centrex account and/or your number (33 xx xx…).
Please note: If you enter your mobile phone number as a call reception number and your voicemail is triggered during a call, the software solution will not be able to pick up the call. This is because setting off an answering machine is equivalent to answering a call and the caller will therefore end up on your voicemail.
7 - Telephone self-diagnostics
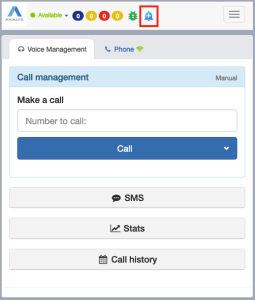
The telephone self-diagnostics button will tell you if your operator toolbar is functional, so that you can begin your working day.
Click on the telephone self-diagnostics button to generate a call. Once the call has been picked up, a message will indicate if your operator toolbar is functioning with your telephone.
8 - Native notifications
You have the ability to set up native notifications. This allows you to receive notifications indicating that a call is waiting in a queue.
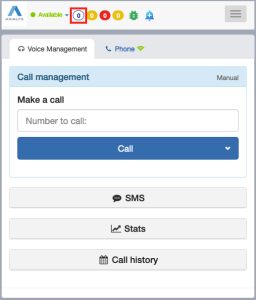
Click on a coloured bubble for a given group. This will allow you to receive notifications even though you are on a break, informing you that a call is waiting in this queue. To disable these notifications, click once more on the queue.

When you have a call waiting notification, click on this notification to set your status to available and accept the call.
- Table of contents