Voice Management Guide
The Voice Management user guide
- To start
- Prerequisite
- Home
- Administrator
- Importing sounds to your IVR
- Creating a routing
- Importing a directory
- Prohibit transfers to certain numbers
- Creation of a skill group
- Creation of an operator toolbar
- Gestion of an operator
- Creation of an IVR
- Satisfaction survey
- Campaign
- Webcallback
- Link WebCallBack
- Generating a WebCallBack link
- Gestion of a supervisor
- SMS service
- SMS in the operator toolbar
- SMS in the operator toolbar
- Statistics
- Operator
- Supervisor
- Technical side
- API
- SSO authentification
- Call recording
- Integration
- Application setup (Microsoft Dynamics)
- easiware integration
- Salesforce
- Zendesk
Voice Recognition stage
1 - Definition of options
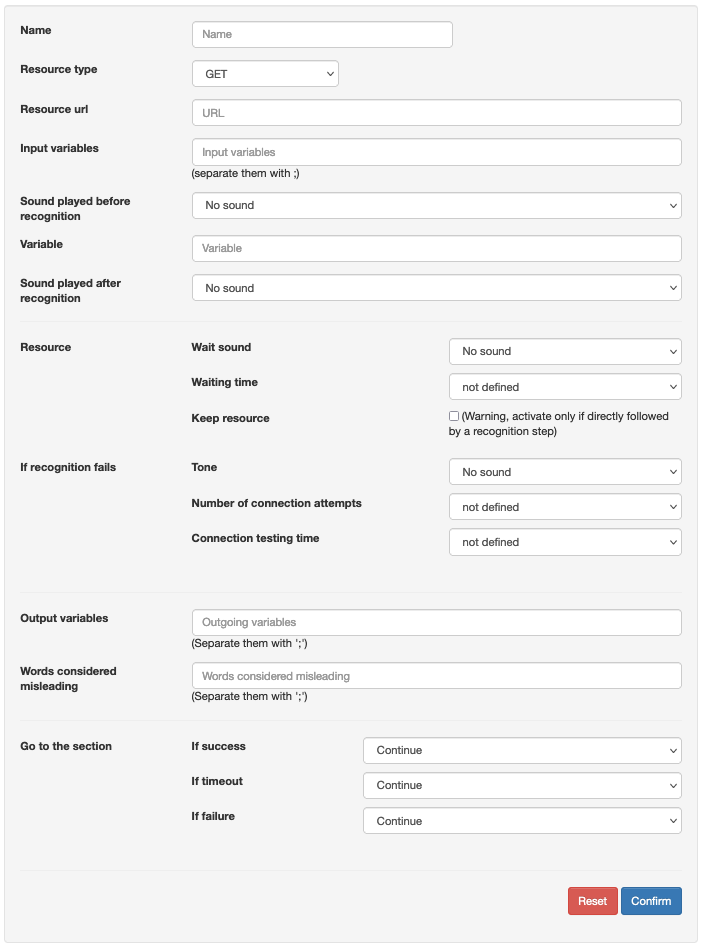
| Name: | The name given to your recognition. This does not have an impact on the rest of the configuration |
| Step type: |
<speech-context id=”perso” speech-complete=”true” scope=”hint” language=”fr-FR”> id => ne pas changer
(*)Grammar: a collection of words to be recognised |
| Input variables |
Personalised variables, @e164_caller, @e164_service… |
| Sound played prior to the presentation of the person: | Sound played to the caller while waiting for the entry. Example: “If you would like to talk to” |
| Variable : | Corresponds to the name of the variable containing the ID of a specific sound to be played. Example: “Cécile” |
| Sound played after the presentation of the person: | Sound played to the caller after the entry. E.g. “Say yes” |
| Resource waiting sound : | The length of time required for recognition can vary. It is thus possible to set a sound while waiting for connection to the server.
|
| Output variables : | Name of the variable to recover the word spoken to direct the call, display the agent etc. |
| Words considered in error: | If the text is recognised (in the grammar) but produces error messages, then the call will be redirected to “step if failure” |
| Go to step: | The step to which the call will be directed in case of:
|
2 - Practical application
Here is an example of the implementation of voice recognition:
1- Setting up a welcome message
Put a welcome message on your automatic IVR.
2- Applying “Sound” variables in your voice recognition
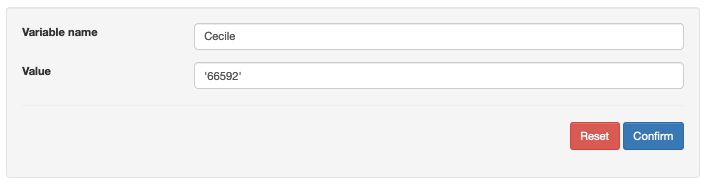
If you wish to use the same sound that you recorded in your voice recognition several times, you can first create a variable with the “Variable name” found in the “Recognition” stage and the “Value” that corresponds to the ID of the sound, which you can find in the “Sound” tab.
3- Voice recognition stage

The configuration of this voice recognition stage was of the “Simple” type; two words were listed in the “grammar” field: Saturday and Sunday (1). The “Sound played prior to the presentation of the person” is a question regarding the caller’s preference: “Do you prefer Saturday or Sunday?”
We find the variable (2) that we set up in the previous stage, which will play the configured sound.
The output variable (3) has been configured to be linked with the next stage; filtering. This allows you to distribute calls depending on the caller’s response.
Steps (4) have also been configured in case of failure of the recognition, or if the waiting time is too long. You can, for example, apply a sound indicating a technical problem.
4 – Distribute calls based on the caller’s response
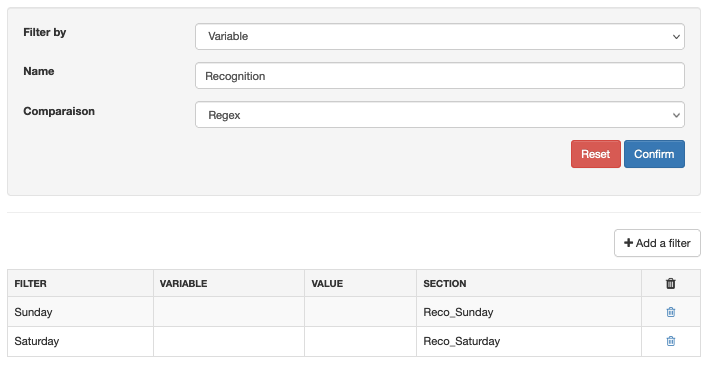
Following the “Voice recognition” stage, you can set a “Filtering” stage to filter calls depending on the caller’s response, and redirect the call to the appropriate contact or the correct message. Configure the filter on “Variable” with the same “Name” assigned during the previous stage for the output variable.
In the filters, we find the two words, “Sunday” and “Saturday” from our grammar. Each redirects to its own step.
- Table of Contents