Voice Management Guide
The Voice Management user guide
- To start
- Prerequisite
- Home
- Administrator
- Importing sounds to your IVR
- Creating a routing
- Importing a directory
- Prohibit transfers to certain numbers
- Creation of a skill group
- Creation of an operator toolbar
- Gestion of an operator
- Creation of an IVR
- Satisfaction survey
- Campaign
- Webcallback
- Link WebCallBack
- Generating a WebCallBack link
- Gestion of a supervisor
- SMS service
- SMS in the operator toolbar
- SMS in the operator toolbar
- Statistics
- Operator
- Supervisor
- Technical side
- API
- SSO authentification
- Call recording
- Integration
- Application setup (Microsoft Dynamics)
- easiware integration
- Salesforce
- Zendesk
Personal settings
1 - Introduction
In the Voice Management steps, the “Personal settings” stage will allow you to set up a basic IVR consisting of several default variables. These variables include the sounds, steps, routing, groups… If you have several services for which the IVR does not change, but whereby the variables are different, you can thus work on the basic IVR, but quickly modify the variables in order to adapt them to your services.
Go to the “Steps” tab
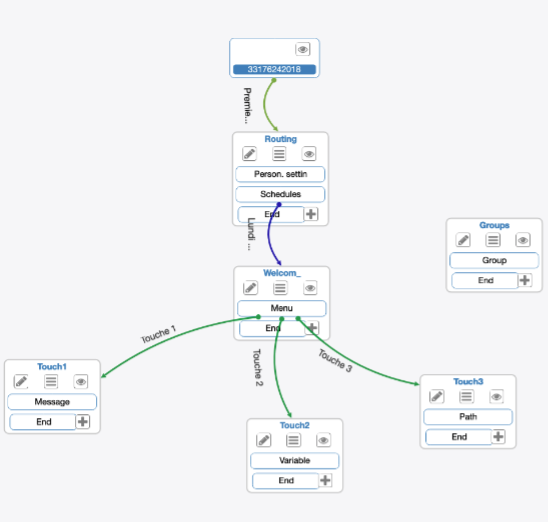
Set up your basic IVR, that is, the routing that you want the call to follow on the IVR. You must link all of the numbers of your services that will be affected by this IVR to the IVR.

2 - Creating personal settings
Go to the first Step of your IVR, and insert a new “Personal settings” stage at the start of the step.

Under “Name of the settings table”, you can set two types of name (variables)
- @e164_service: Service no. (if your IVR is linked to service numbers)
- @e164_caller: Caller no. (if your IVR is linked to caller numbers)

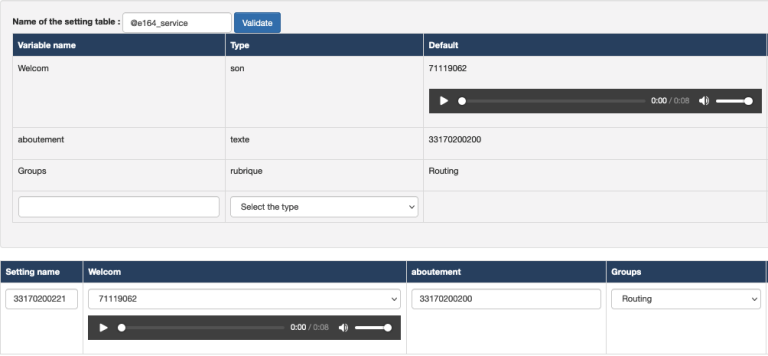
Once you have validated the name, two tables appear:
The first table will allow you to set up a glossary. You can assign a name to the variable that will be modified depending on the service and the type of variable to which it corresponds.
The second table allows you to link variables to the various service numbers in order to adapt the IVR to suit them.
In the 1st table:
First assign your variable a name. This is the variable you will find in all of your IVRs. A variable can be any of several types:
- Step: This will allow you to adjust the step to which the call will be transferred,
- Sound: This will allow you to configure the music/message played, depending on the IVR,
- Text: This will allow you to configure the routing
- Number: This will allow you to configure numbers

In the first column, enter the name of your Variable. This will be the name that you then enter in the steps to be adapted, depending on the service.
In the second column, you can choose the Type of variable. That is, which type of variable will be modified in the stages of the IVR.
By default, in the third column, you can specify the:
- Step: The stage/step that the call will go to, after the current step
- Sound: What is the sound that you want as the default setting for the entire IVR?
- Text: What is the name of the routing that you want as your default?
- Number: To which service number would you like to redirect the call?
Once the row has been filled in, click on “Add”. You can add as many rows as you like.

In the 2nd table:
All of the variables that you have added are found in the second table. In the first column you can enter the service/caller numbers from which the calls are received. The subsequent columns will allow you to enter the different variables that you wish to adapt to the number. The call will follow the routing of the IVR, but will adopt the variables that you have entered on this page.
To configure a message

In Personal settings: Create an “XX” variable, of the “Sound” type, whereby the default will be the sound that you want to have for all of your services.

In the second table, in the row of the concerned service number, you can leave the default message previously entered or adjust the message depending on the service.

- In the step for the message concerned, create a “Message” stage. Under Sound Type, select “Sound depending on variable ID”, then enter the name of variable “XX” that you created in the first instance, under “Variable”.
- If you have different “Sound” stages, please create as many variables as you have sounds in Personal Settings.
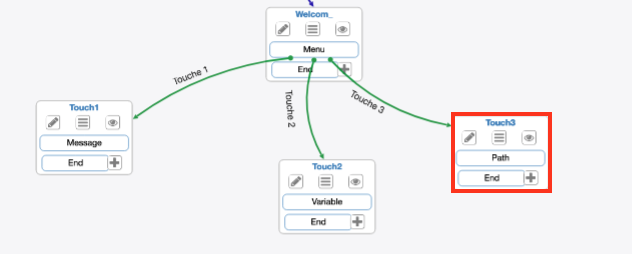
3 - To configure a group
In Personal Settings: Create a variable, “XX”, of the “Step” type, whereby the default will be the next stage to which the step will lead.

In the second table, in the column bearing the name of your variable XX: enter the step that contains the group in question (and not the step with the variable stage)


In the step entered in the IVR to which the call will be transferred in order to ring a skill group, create a step with a variable stage. Under Variable name, enter @next, and under Value enter the name of the variable (which can be found in Personal Settings)

Create one/multiple step(s) with a group stage. You must create as many steps as you have different groups for each service. This is the name of the step that you will enter under Personal Settings (in the “Default” setting). In fact, once your steps have been created, you will enter them in the rows of the corresponding services in the second table, in the column bearing the name of the variable.
3 - To configure a routing
In Personal settings: Create a variable, “XX”, of the “Text” type, whereby the default will be the number to which you want the routing to lead.

In the step containing the routing stage, enter the name of the routing (which you will find in the Voice Management “Routing” tab)
In the routing stage of your IVR, enter the name of the routing in the “Routing” field.

Go to the “Routings” tab of your Voice Management. In the concerned routing, the “Name” field must contain the same name as the routing stage of your IVR, and in the “Number” field you will enter the name of the variable created in the first instance, in Personal Settings.
- Table of Contents