Voice Management Guide
The Voice Management user guide
- To start
- Prerequisite
- Home
- Administrator
- Importing sounds to your IVR
- Creating a routing
- Importing a directory
- Prohibit transfers to certain numbers
- Creation of a skill group
- Creation of an operator toolbar
- Gestion of an operator
- Creation of an IVR
- Satisfaction survey
- Campaign
- Webcallback
- Link WebCallBack
- Generating a WebCallBack link
- Gestion of a supervisor
- SMS service
- SMS in the operator toolbar
- SMS in the operator toolbar
- Statistics
- Operator
- Supervisor
- Technical side
- API
- SSO authentification
- Call recording
- Integration
- Application setup (Microsoft Dynamics)
- easiware integration
- Salesforce
- Zendesk
Importing a directory into the operator toolbar
The operator toolbar allows you to make calls, or to transfer them to the contacts that you have integrated in advance via the administrator interface.

Please go to the administrator interface, “Contact management” tab. In the first “Contacts” tab you will see the various contacts already integrated and the associated information.

You can delete either one contact at a time(1), or all of the contacts at once (2). Note: once the deletion has been performed, you cannot undo the action.

You can also change the numbers directly from the interface. The two numbers are modified directly in the field. Once the numbers have been changed, click on “Change” to make the change effective.
Add one/several contacts(s)
You can add one or more contact. If you wish to import a single contact, click on the “Add a contact” button and complete the form.

If you wish to import several contacts at once, click on the second tab, “CSV Import”. You will then be able to import your contacts. Download the CSV template by clicking on “sample.xlsx”. An Excel file will download and you will be able to fill in the various columns of the table. You do not need to fill in all of the columns for the contact to be taken into consideration: First Name, Surname, Location, Entity, Number 1, Number 2, Email Address.
Whether or not to display Centrex accounts during a banner transfer

(Un)tick the option “Show Centrex accounts when transferring to contact” to display Centrex accounts in the list of contacts when an operator initiates a transfer “to contact”.
Telephone numbers must be in e164 format.

Once your CSV has been filled in, save it and click on “choose a file”. Choose your file and click on “Upload”. You will find your contact in the first tab.
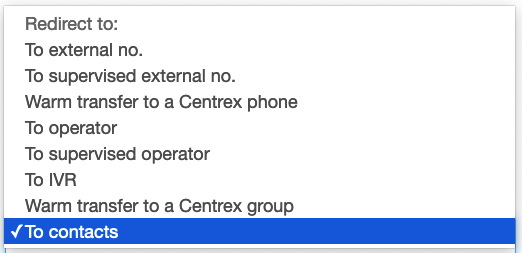
The operator will thus be able to search for the contact using his surname or first name, by typing the first few letters in “Number to call”, or when making a transfer, by clicking on “to contacts”.


- Table of Contents